How to Clean Your Paver Patio: A Step-by-Step Guide to a Spotless Outdoor Space
Adam Lawson • March 11, 2025
A paver patio is a beautiful addition to any backyard—offering style, durability, and a perfect spot for relaxation or entertaining. But like anything exposed to the elements, it can get dirty over time. From dirt and leaves to stains from spilled drinks or grill grease, keeping your paver patio looking its best requires a little TLC. The good news? Cleaning it is simpler than you might think. Here’s your step-by-step guide to restoring your paver patio to its former glory.
Why Clean Your Paver Patio?
Beyond aesthetics, regular cleaning prevents buildup that can damage pavers over time. Dirt and organic debris like moss or algae can make surfaces slippery, while stains can seep in if left untreated. A clean patio not only looks great but also extends the life of your investment. Let’s dive into the process!
Tools and Supplies You’ll Need
* Broom or leaf blower
* Garden hose with a spray nozzle (or a pressure washer, if you have one)
* Bucket
* Mild dish soap or a paver-specific cleaner
* Stiff-bristled brush (avoid metal bristles to prevent scratching)
* Optional: White vinegar or baking soda for tough stains
* Polymeric sand (if joints need refreshing)
* Safety gear: gloves and eye protection
Step 1: Clear the Surface
Start by removing furniture, planters, or anything else on your patio. Then, grab a broom or leaf blower to sweep away loose dirt, leaves, and debris. This simple step makes the deeper cleaning much easier and prevents gunk from getting pushed into the joints between pavers.
Step 2: Rinse It Down
Use a garden hose with a spray nozzle to give the patio a thorough rinse. This removes surface dirt and softens stuck-on grime. If you’re using a pressure washer, keep it on a low setting (around 1200-1500 PSI) and use a wide-angle tip to avoid dislodging the sand in the joints or damaging the pavers. Test a small area first to get the pressure just right.
Step 3: Apply a Cleaning Solution
For general cleaning, mix a few drops of mild dish soap with warm water in a bucket. For tougher stains or mildew, a paver-specific cleaner from your local hardware store works wonders—or try a 50/50 mix of white vinegar and water for a natural alternative. Dip your stiff-bristled brush into the solution and scrub the pavers in a circular motion, focusing on stained or dirty spots. Let the solution sit for 5-10 minutes to break down grime.
Step 4: Tackle Stubborn Stains
Got grease stains from the grill or rust marks from patio furniture? Sprinkle baking soda on the spot, add a splash of vinegar, and scrub until it lifts. For oil-based stains, a degreaser designed for pavers can be a lifesaver. Always rinse thoroughly after treating stains to avoid residue buildup.
Step 5: Rinse Again
Once you’ve scrubbed everything, rinse the patio with your hose or pressure washer to wash away the soap and loosened dirt. Work from one end to the other to avoid pushing dirty water back over cleaned areas. If you notice water pooling, check your patio’s slope—proper drainage is key to preventing future issues.
Step 6: Inspect and Refresh Joints
After the patio dries (give it a day or two), check the sand joints between pavers. If they’ve eroded from cleaning or weathering, sweep fresh polymeric sand into the gaps with a broom, then lightly mist with water to set it. This keeps your pavers stable and weed-free.
Step 7: Seal (Optional)
For extra protection, consider applying a paver sealant once everything’s dry. Sealants enhance color, repel stains, and make future cleanings easier. Follow the product instructions—typically, you’ll use a roller or sprayer—and avoid overuse to prevent a slippery finish.
Maintenance Tips to Keep It Clean
* Sweep weekly to prevent debris buildup.
* Rinse off spills (like wine or ketchup) ASAP to avoid stains.
* Pull weeds from joints early before they take root.
* Clean your patio once or twice a year, depending on climate and use.
Final Thoughts: Enjoy Your Pristine Patio
With a little effort, your paver patio can look as good as new—ready for summer barbecues, cozy evenings by a fire pit, or just soaking up some sunshine. Whether it’s a sleek modern design or a vibrant patterned layout, a clean patio is the backbone of a welcoming outdoor space. So grab your broom, roll up your sleeves, and get started—your backyard deserves it!

Brick walk way with leaves on it and pumpkins by it.
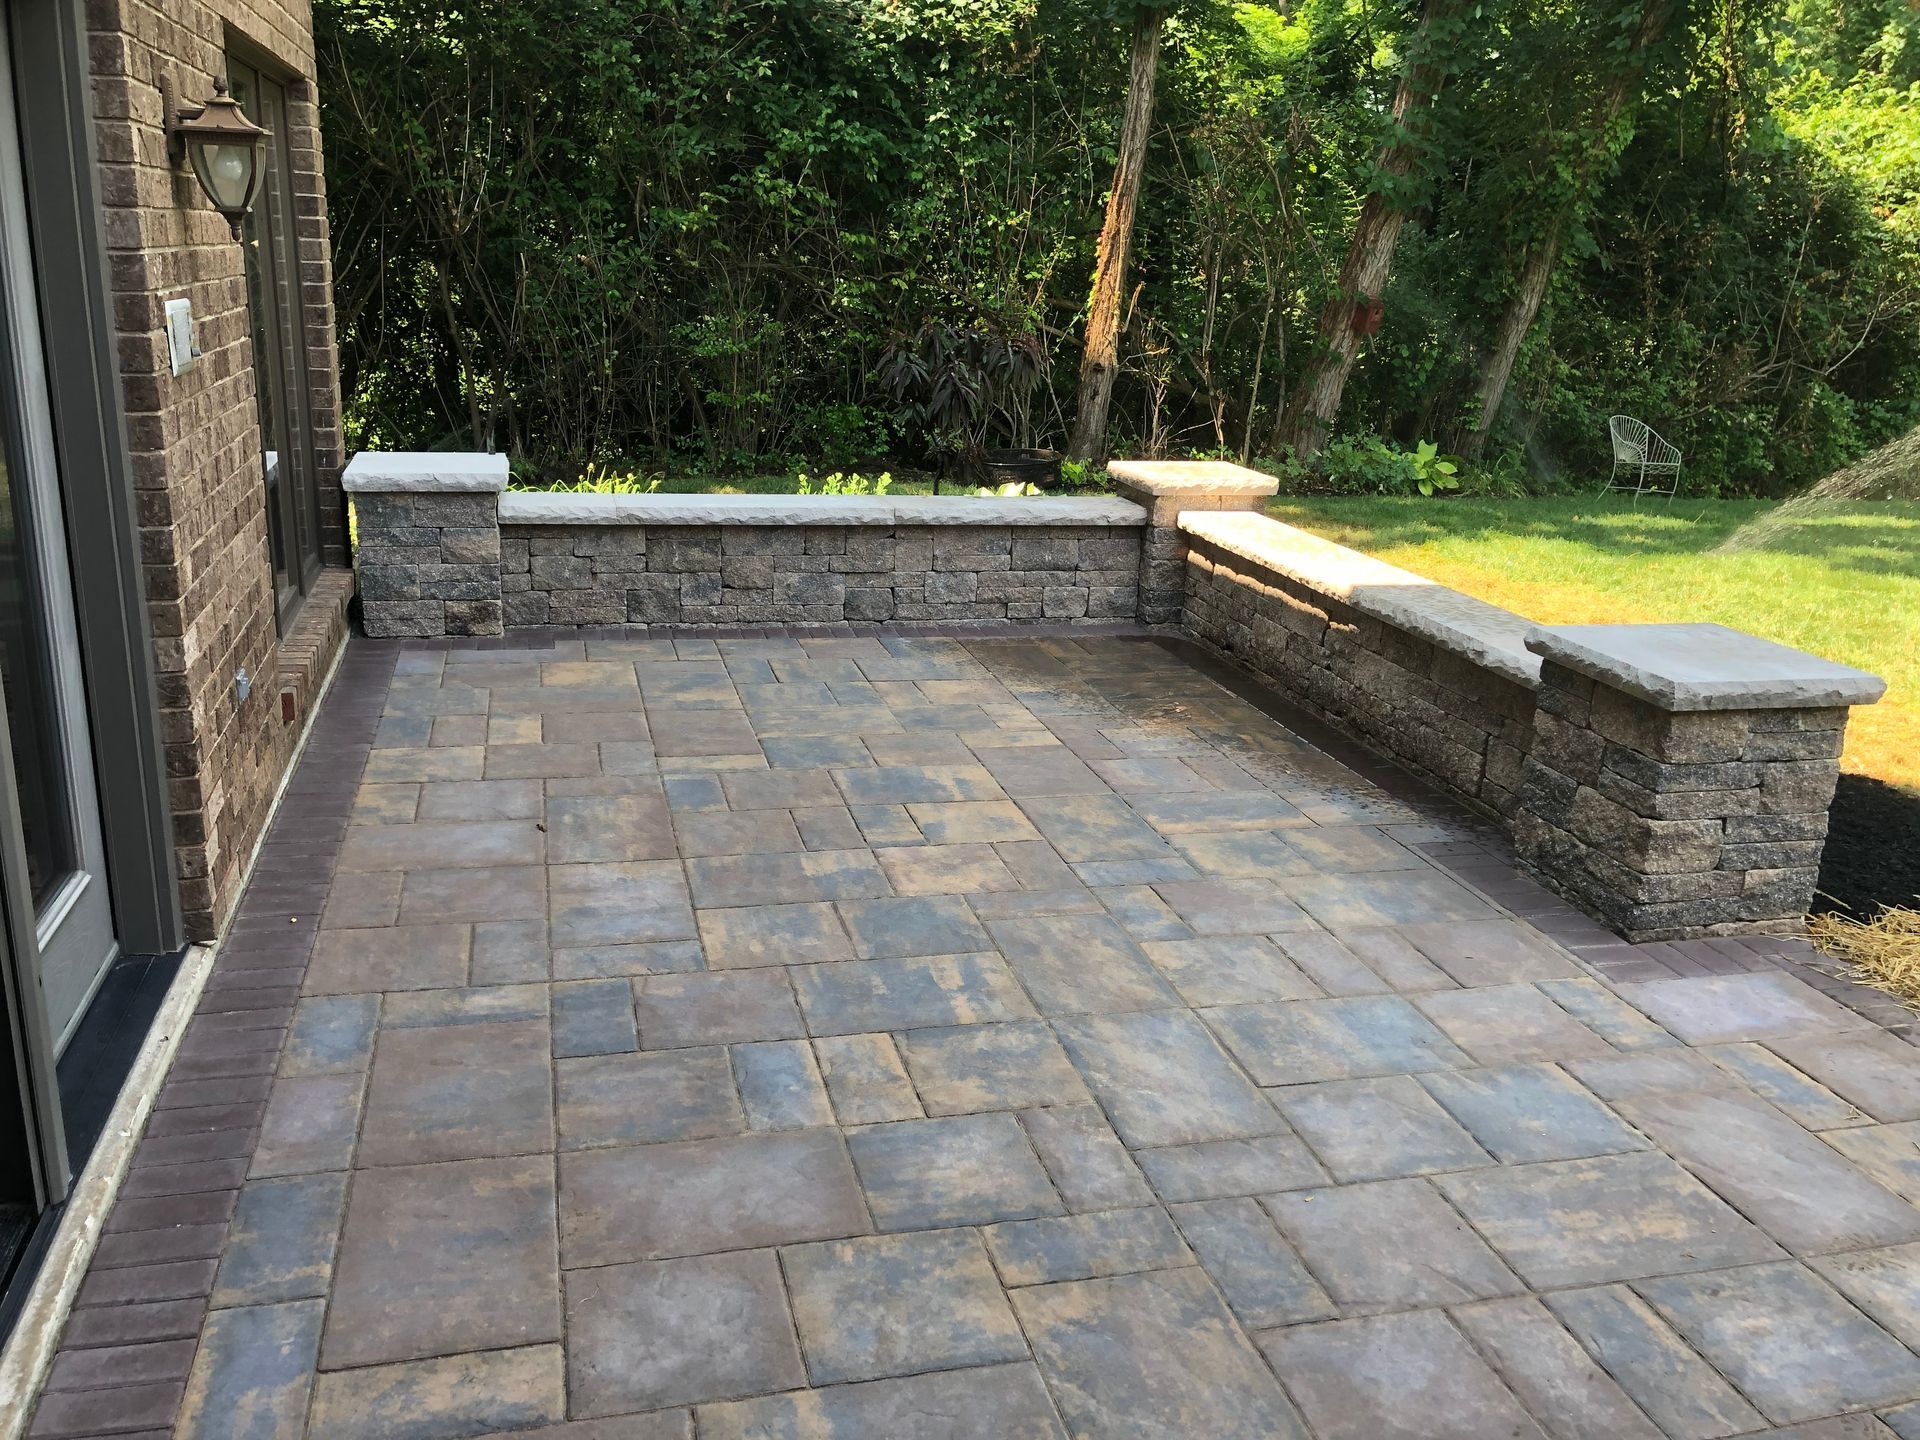
Paver patio with sitting wall and columns.
A person planting a tree in the fall for the best results.